
 All of my writing is licensed under a
 Creating Thumbnails for the Synology DSM PhotoStation
Having updated my Synology NAS box to the latest Disk Station Manager (DSM) - version 6.0.2 as of December 2016 - I read that the PhotoStation thumbnail filenames had changed, and it now generates fewer of them which takes less time and saves space. Given that we’ve somewhere north of 105k photos and videos, it would take the little 1.6GHz ARM CPU in the Synology weeks (if not months) to recreate them so I started looking for a faster way.
After a brief search I found the sterling work of Matthew Phillips’ synothumb script, which has been tweaked a few times most recently by one Andrew Harris and it’s his version I started with.
Prerequisites
- Synology NAS with PhotoStation installed
- Any PC, Netbook or Laptop that’s more powerful than our Synology NAS, and that we don’t mind leaving running for long periods of time (possibly days, depending on fast it is and how many photos we have..), and ideally with a wired Gigabit LAN connection
- A Linux install or a live CD - I recommend the latest Linux Mint Cinnamon (18.1 as of writing)
- An executable copy of the
synothumbPython script in our linux home directory..
curl -o synothumb.py https://raw.githubusercontent.com/AndrewFreemantle/synothumbs/master/synothumb.py
chmod +x synothumb.py
1. A little Synology configuration..
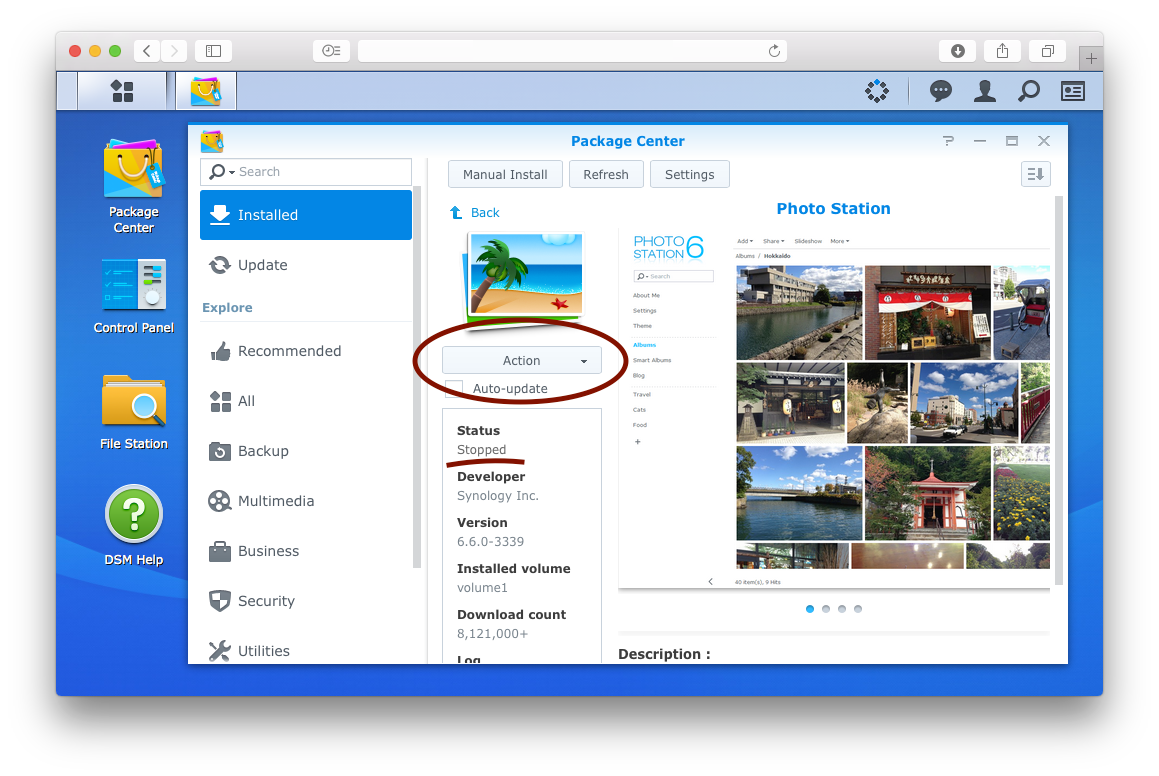
First we have to configure the NFS settings in the Synology DSM - log in as ‘Admin’, open up the Package Center and disable PhotoStation - it’s in the Action menu..
Next we need to enable NFS, which we’ll find in the Control Panel under File Services.. we tick the Enable NFS box if it isn’t already and then click Apply

And then we need to configure it.. still in the Control Panel, this time in Shared Folder (just above File Services), we select the photo folder and click the Edit - in the ‘Edit Shared Folder photo’ window, we need the last tab called NFS Permissions where we need to Create a new Read/Write privilege for the IP address of our Linux client. Click Apply and then OK

2. Connecting from Linux to our Synology
Now to our Linux client.. first we need NFS and the video libraries installed. In a Terminal we run
sudo apt-get install nfs-common ffmpeg libav-tools ufraw
Then we can check if we’ve configured NFS properly by running
showmount -e {synology-ip-address}
If it returns the IP address of our Linux client then we can mount the photo share like so..
cd; mkdir mnt_photo
sudo mount -t nfs {synology-ip-address}:/volume1/photo mnt_photo/
3. (Optional) Remove existing thumbnails
Matthew’s synothumbs script skips media that already has thumbnails, so if we want to recreate them all rather than generate any missing ones we just need to run this first..
find mnt_photo/ -type d -name "@eaDir" -exec rm -rf {} \;
4. Generating thumbnails
./synothumb.py mnt_photo/
5. Monitoring progress..
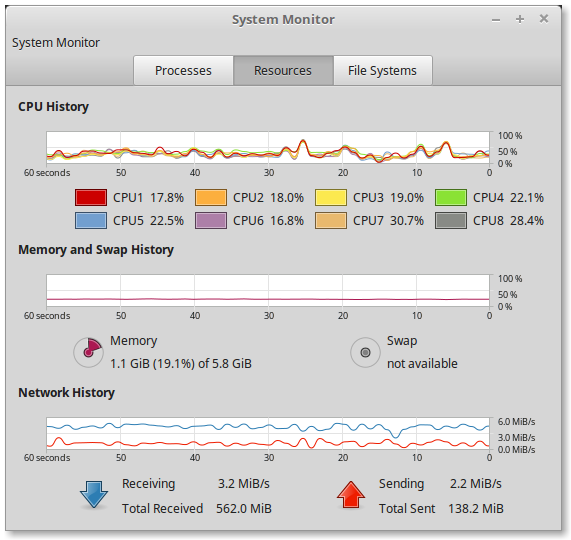
As well at watching the image and video filenames fly past, I like to have the Activity Monitor with the graphical Resources tab running..
6. Finishing up..
A little while later..
Once the synothumb.py script has finished, we need to modify the ownership and permissions of the thumbnails we’ve generated. For this we need an SSH or terminal / telnet session on our Synology, then we can issue the following:
admin user, we can issue the following command to become root (it'll prompt us for our Admin password again)admin@Synology#
sudo -i
root@Synology#cd /volume1/photo
root@Synology#find . -type d -name "@eaDir" -exec chown -R PhotoStation:PhotoStation {} \;
root@Synology#find . -type d -name "@eaDir" -exec chmod -R 770 {} \;
root@Synology#find . -type f -name "SYNOPHOTO_THUMB*" -exec chmod 660 {} \;
Next we need to ensure that when the PhotoStation starts re-indexing that it can’t re-create the thumbnails itself - that would seriously defeat the point of all of the work we’ve just done! Fortunately it’s easy to do.. while we’re in our SSH or terminal / telnet session we can point the existing thumbnail links to a simple script that just returns success!
root@Synology#cd /usr/syno/bin
root@Synology#echo -e '#!/bin/bash\nexit 0' > fake-thumb.sh
root@Synology#chmod +x fake-thumb.sh
Next we’ll just make a note of the current symbolic links:
- Photos: root@Synology#
la -la convert-thumb - Videos: root@Synology#
ls -la ffmpeg-thumb
Which should yield the following results:
convert-thumb -> /usr/bin/convertffmpeg-thumb -> /usr/bin/ffmpeg
Now we can point these symbolic links to out fake-thumb.sh script:
root@Synology#ln -s fake-thumb.sh convert-thumb
root@Synology#ln -s fake-thumb.sh ffmpeg-thumb
Back to our Linux thumbnail processing box, we can unmount the drive..
sudo umount mnt_photo
.. and in the DSM we then
- Remove the NFS Permission we created (Control Panel > Shared Folder > photo > NFS Permissions)
- Disable the NFS Service if we enabled it
- Restart the PhotoStation package (Package Center > PhotoStation > Actions > Run)
Once the PhotoStation package is back up and running it should automatically start re-indexing - that is, searching /volume1/photo for new photos. If we’d just copied a lot of new photos and videos onto our Synology box then this process can take longer than the thumbnail generation! - for every media file found it reads the file’s EXIF data and writes it to local database.
We can check that the re-indexing has started (and kick it off it hasn’t) by opening PhotoStation in our browser - https://{synology-ip}/photo - and logging in as Admin.
Then we choose Settings > Photos > and click Re-index

When the PhotoStation’s re-indexing has finished, we mustn’t forget to revert the thumbnail symbolic links:
root@Synology#ln -s /usr/bin/convert /usr/syno/bin/convert-thumb
root@Synology#ln -s /usr/bin/ffmpeg /usr/syno/bin/ffmpeg-thumb
Done 🙂
Huge thanks to Matthew Phillips for creating the synothumbs script in the first place, to all the forkers for their tweaks and to Francesco Pipia for his comment that helped me get the NFS connection working! Grazie mille!